How to Measure a Frame for a Silicone Edge Graphic (SEG)
Silicone Edge Graphics (SEGs) are a sleek and modern display solution widely used in retail, trade shows, and corporate environments. To ensure a perfect fit, precise measurements of the frame are essential before ordering a new SEG fabric print. Here’s a step-by-step guide to help you measure the frame for a Silicone Edge Graphic (SEG) to ensure the best fit and visually stunning results.
Step 1: Understand the Frame Type
Before taking measurements, identify the type of frame you have. SEG frames come in various depths and configurations, including wall-mounted, freestanding, and lightbox options. Knowing the frame type helps determine if any special adjustments are necessary.
Step 2: Measure the Outer Frame Dimensions
Using a metal tape measure, measure the full width and height of the outside edges of the frame. This gives you the overall dimensions of your display. For accuracy, measure from edge to edge and record the numbers in inches.
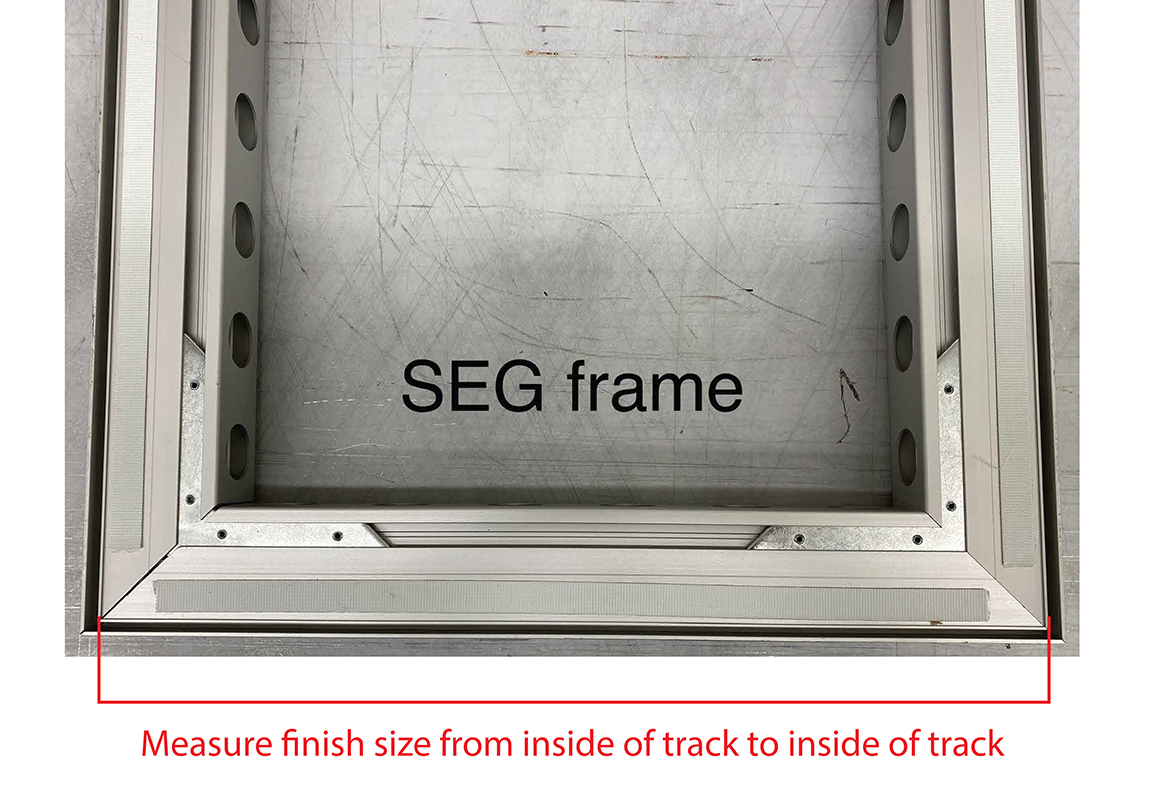
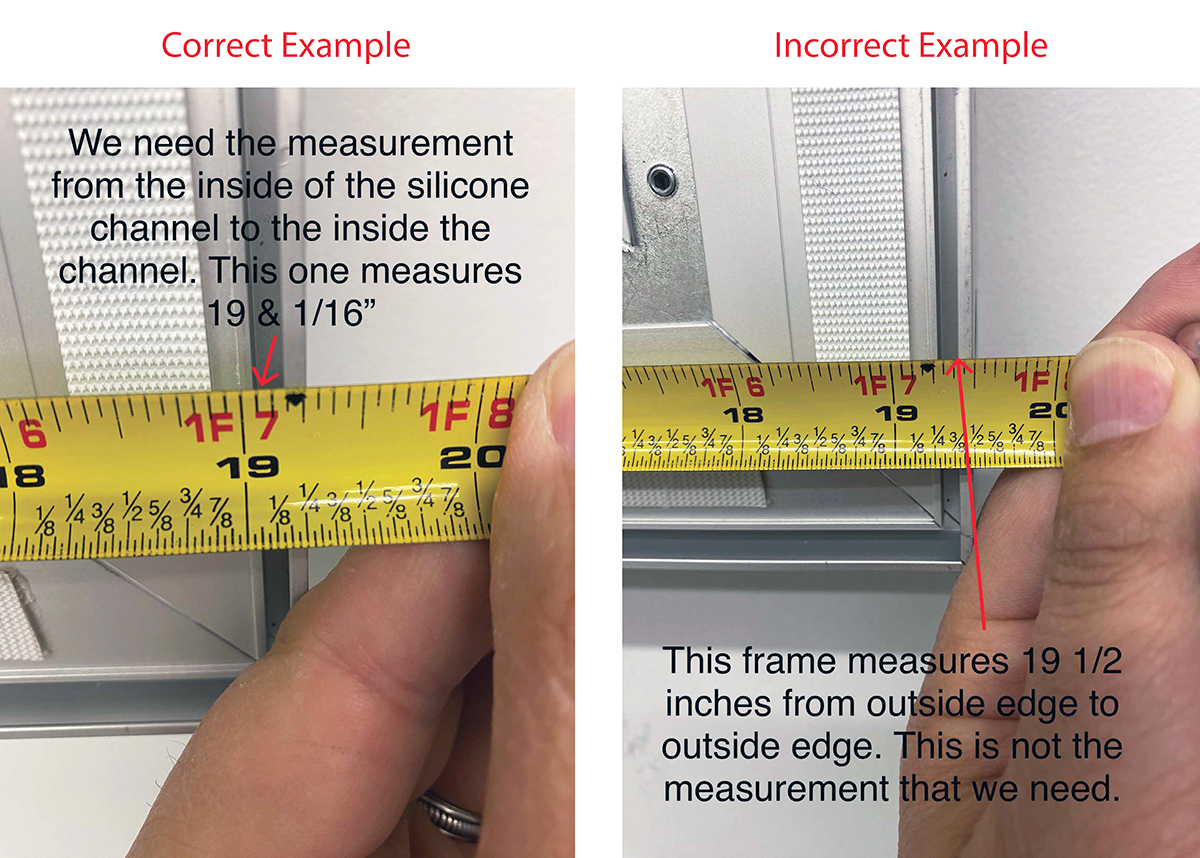
Step 3: Measure the Inner Frame Dimensions
Since the silicone beading of the SEG fits into a recessed channel, measuring the inner frame dimensions is CRITICAL. Measure the width and height from the inside edge where the fabric sits in the groove. This ensures the print will fit snugly without excess fabric or gaps. Measure to 1/16 of an inch. (See images at the bottom of page)
Step 4: Check the Depth of the Recessed Groove
The depth of the groove in the frame where the silicone edge tucks in varies among manufacturers. Typically, it ranges from 10mm to 15mm. Measure the depth of this groove to ensure the silicone strip on the fabric is appropriately sized for a secure fit.
Step 5: Verify Corner and Joint Alignment
For large-format SEG displays, check the corners and joints of the frame to confirm there are no distortions or warping. Misalignments can affect the final fit of the fabric. If any inconsistencies are found, adjust measurements accordingly.
Step 6: Double-Check Your Measurements
Always verify your measurements at least twice to avoid errors. Small inaccuracies can lead to a print that is too loose or too tight, impacting the professional appearance of the display.
Conclusion
By following these steps, you’ll get accurate frame measurements, allowing for a seamless, tensioned fabric graphic that enhances your display’s impact. Need assistance with your SEG printing? Contact us today to ensure your graphics fit perfectly every time!